It's a circus in here
Last few weeks have been lacking in content and Friday Flashbacks, but I've not been idle. If anything I've been busier than ever. Even without a shop full of scenery, I've had my hands full getting Little Dude ready for Kindergarten.
Meanwhile in the shop I've been tackling our big musical for the fall, Barnum, or as I like to call it, 'Holy crap, that's a lot of soft goods!'
This show is filled with drops, banners, swags, and painted fabric galore. There's also a few hard scenery pieces (doors, circus plinths, poles, pedestals, rolling units, and a staircase of building) to keep me busy as well. Oh and there's the elephant....or rather the lower half of one. (you will see).
So let's get you caught up, shall we?
The first project I was able to start was the Jumbo signs.These were the only things I had muslin on hand for. Stretched over frames like a canvas, the muslin was then sized, based and the layout drawn on it.
The inked letters ready to paint.
In progress. You can see the white being added to the lettering on the back one.
Nearly done.
And done. I really like how these came out. It was a nice start to the show.
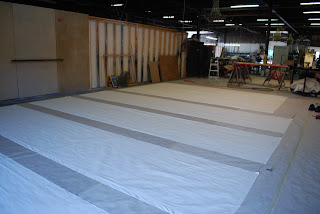
While working on the above signs, the muslin order came in and I started on the rest of the soft goods. The side walls have striped swagged curtains, reminiscent of a circus tent. The longer pieces are for those. The shorter piece farther on is for the remaining banners.
And behold the magic of starch.
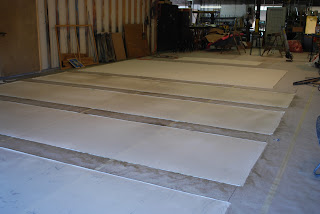
I seem to have forgotten the camera on the day I completed the 'white' stripes and the banners. Pulled up the 'white' ones and started on the red. Starched and painted.
These were then pulled up and sewn together. Now the await flame proofing and the the finishing decorative swag detail.
Time for the portal drop. From the box...
squared and stapled down...
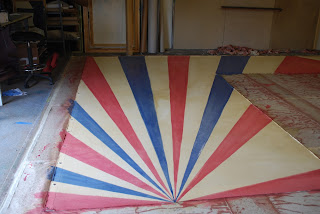
Again the camera was lacking on the day I starched, drew the layout, and based the striped portal drop.This is what it will look liked in space. The gold arches are going to be hard pieces that the fabric will be attached to. The top and sides are tied off to poles. Across the top will be flags and swags and lots of showy goodness.
Here's the red stripes. I labeled the heck out of these things. I was terrified of painting the wrong color in the wrong place.
Then the blue stripes.
That is one reason I go through a lot of primer.
Here is the lovely diamond pattern that wraps around the wagon edge. Strangely enough the pattern pretty much worked out even. There was a little tweaking on the short end, but not enough to look to horrible.
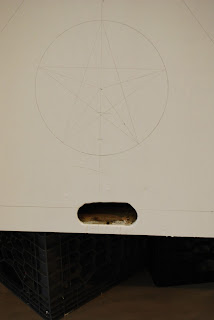
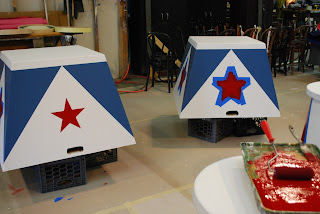
The plinths offered a few layout challenges. The finished pieces are different sizes from the draftings. The sizes changed due to instructions from the director and pieces we already owned. So I had to tweak measurements a little bit. I went old school geometry on the stars with a protractor and some trammel points.
After all the pencil layout, I inked the lines I needed for painting. Then I rolled another coat of primer. This will cover the pencil lines but leave the Sharpie still visible enough to use as a guide.
I had a bid more trouble with the circular plinths. I figured to do the layout I'd need a vertical line on these pieces. But you might notice that the bases are not straight cylinders but tapered like cones. This posed a problem for getting an accurate line. That's where the miracle of the laser level comes in. Gave me a perfect vertical line to start from. From there I measured around and kept dividing until I had enough points. As you can see from the front plinth I ended up needing to add more to get the right look, hence the black lines and red lines. I took a different approach on the second one. I couldn't just transfer the measurements because they were different sizes. I wrapped around a thin strip of paper and cut to size. Then I just kept folding and marking to divide it evenly.and then used it as a ruler to mark points. Much easier. I couldn't
Then some blue tape and I (finally got to painting).
The best advice with the blue tape is to remove it as soon are you are painting. If you let it dry you run the risk of pulling off what you just painted.
And that's as far as I got...Little Dude fell ill and I had to switch into Mom mode.
Now you are caught up on Barnum. Next week will start off with finishing the plinths and the wagon, flameproofing the soft-goods and tweaking a previously painted scrim.










1 comment:
This looks very exciting!
Maybe not for you day after day painting and waiting and... who am I kidding? This IS exciting and loads of fun.
Post a Comment